wild garlic everywhere

Spring is definitely in the air, here in the Stroud valleys and I’ve been using our daily exercise productively this week and foraging for lots of lovely wild garlic to cook with.

The woods and hedgerows are filled with it at this time of year and you can use every bit of it. The leaves are delicious and mildly garlicky and I often shred them into a pasta sauce or a curry, in place of an actual clove of garlic. The flowers are also edible with a little garlic pop and they make the most wonderful tempura fritter or a pretty addition to a salad.

Photo 16-04-2020, 17 30 32.jpg
Photo 31-03-2020, 16 24 43.jpg

Here are a few of my favourite recipes…

WILD GARLIC PESTO

This isn’t really a recipe, more an assemblage, as it totally depends on how much you are making and what you have in the pantry. it’s fairly forgiving so don’t get stressed about it!

So, put into a blender or processor:

a handful of wild garlic leaves well washed,

a handful of basil leaves if you have them (not essential but a nice addition),

a decent pinch of salt and pepper,

a good few glugs of olive oil, (I usually do 2 big glugs of everyday olive oil and one big glug of extra virgin - you may need more depending on quantity).

a small handful of toasted nuts, (I often use a mix of almonds and pine nuts, but have successfully done it with toasted flaked almonds and also with cashews - because that’s all I had in!)

Give it a blitz to break down the nuts and leaves and add a handful of grated parmesan, pecorino, or a mix of both and give it another blitz. If it feels a little dry add a bit more olive oil and taste for seasoning.

This pesto is delicious on pasta, spread onto a panini with mozzarella, dolloped into minestrone soup or dribbled over a tomato salad.

Photo 16-04-2020, 17 31 20.jpg
Photo 01-04-2020, 13 27 18.jpg

WILD GARLIC AND CHEESE SCONES - This is based on a Delia recipe for cheese and chive scones, but I’ve adapted it!

Sift 175g self-raising flour into a mixing bowl and add 1/2 teaspoon each of mustard powder, cayenne pepper and salt. Rub in 30g butter,

Add:

1 egg

2 - 3 tablespoons of natural yoghurt, buttermilk or milk; (the acidity in yoghurt/ buttermilk has a magical effect on the rise of the scone, but milk works just fine)

a handful of chopped wild garlic leaves

75g grated strong cheddar (or whatever cheese you prefer) .

Bring it all together as a dough, but don’t overwork it or you will have heavy scones. Pat it into a rough circle shape about 2cm thick, brush with a little milk and sprinkle with a bit more grated cheese then cut into sixths. Spread the 6 scones out on a baking tray and bake till golden.

Serve hot with lashings of salty butter.

Photo 25-03-2020, 12 36 21.jpg
Photo 11-03-2020, 08 31 26.jpg

WILD GARLIC TART - This one is super easy and is one of my go-to recipes for a quick lunch or dinner party starter.

You can use the same method with gently cooked leeks, courgettes, Swiss chard or melted onions. The key thing is don’t have your vegetables too wet; really drain any liquid out in a sieve.

Wash a couple of handfuls of wild garlic leaves well and shred the leaves.

Slice a red onion and gently fry it in butter with a pinch of salt and pepper till soft, add the wild garlic leaves and wilt them down gently. If there is any liquid in the pan tip the whole lot in a sieve and let it drain off.

Mix the onions and wild garlic with 1 egg and 2-3 tablespoons of double cream and a big handful of grated cheese. You could use a strong cheddar, or parmesan or even blue cheese, so long as its nice and flavourful and will melt well.

Spread the mixture over a sheet of chilled ready-rolled all-butter puff pastry, leaving 1cm at the edge of the pastry. Sprinkle a little more cheese over the top and bake in a hot oven until puffed and golden.

Serve warm with salad.

WILD GARLIC BUTTER - not really a recipe

Simply mash finely chopped wild garlic and a pinch of salt into some softened butter and use it to make garlic bread or spread it onto warm flatbreads.

Photo 22-03-2020, 12 16 21.jpg
Photo 22-03-2020, 13 00 14.jpg

WILD GARLIC AND RICOTTA CANNELLONI

If you are feeling super adventurous in the kitchen, try making your own cannelloni or ravioli filled with wild garlic and ricotta.

Soften finely chopped onion and celery in a knob of butter and a few sprigs of thyme. Add a few handfuls of shredded wild garlic leaves and a handful of spinach if you have it and wilt it all down.

Then mix it with a tub of ricotta cheese, a handful of grated parmesan a whisper of grated nutmeg and seasoning to taste.

Use this to make your cannelloni which is super easy and fun for kids to make, if you have a pasta machine sitting at the back of a cupboard.

Make a long rectangle of thin pasta dough and cut it into squares. Dollop a sausage shape of filling down the centre and roll them up. Place them in a baking dish spread with tomato sauce and top with béchamel and grated cheese and bake until bubbly.

Photo 22-03-2020, 13 05 26.jpg
Photo 04-03-2020, 16 50 02.jpg

The Best Ever Hot Cross Buns

Hot cross buns are a controversial subject in our house. I don’t like them and everyone else does and because I don’t like them I forget to buy them and then everyone feels hard done by.

MY BUNS FRESH OUT OF THE OVEN ADN GLAZED WITH SUGAR SYRUP.

MY BUNS FRESH OUT OF THE OVEN ADN GLAZED WITH SUGAR SYRUP.


Actually I do like them, I just don’t like the ones in the shops; they are too doughy and heavy and not sticky enough. When I was little, my Dad would always take us to the bakery in the town where we lived, on Good Friday, to collect a dozen fresh hot cross buns. They were always warm, light and fluffy  and generously sticky. We only had them once a year.

Nowadays, (and I’m aware I sound like I’m 107 ) they seem to be available all year round and are so weighty you could concuss a duck with the leftovers.

So, in a bid to go back to the buns of my childhood and to keep my own children happy, I’ve concocted a recipe based on Tom Herbert’s buns - from the Grillstock Cook Book and adapted it. I use a bread maker on the white dough setting to mix and prove the dough, but I think you could do it by hand or in a stand mixer.

RECIPE

A SOFT AN QUITE STICKY DOUGH = LIGHT BUNS!

A SOFT AN QUITE STICKY DOUGH = LIGHT BUNS!

1 sachet dried active yeast - or 7g

500g strong white bread flour

25g butter at room temperature

200ml tepid milk

100ml tepid water

50g soft brown sugar

1 egg

1 tsp salt

1tsp each ground ginger , cinnamon, ground mixed spice

200g mixed dried fruit and peel (I used some leftover from Xmas which had cut mixed peel mixed in.)

METHOD

THESE ARE MY BUNS AFTER RISING BUT BEFORE BAKING

THESE ARE MY BUNS AFTER RISING BUT BEFORE BAKING

Put it all in the bread maker in the above order, or mix by hand adding the fruit when you have a cohesive dough and knead till smooth and elastic.

Cut the dough into about 15 - 18 pieces - it depends on how big you like your buns! (They do approximately double in size.) Roll in to ball shapes.

Space them out on baking trays.

I controversially use…marzipan to make the crosses because my husband loves it but you can use the traditional flour and water paste to make a dough and make the cross with that.

Give them an egg wash and leave to rise somewhere warm for a couple of hours until well risen. I put the marzipan (for the crosses) on very gently after they have risen as they broke apart when I did them before rising , but I think you could do it either way.

Bake till nicely golden brown, I have an Everhot which is set to about 180 degrees C but you know your oven best, so I am not going to give you a temperature other than a guide.

Now for the very sticky top - which is absolutely essential!

Boil 2 - 3tbs tbs sugar with 2 - 3 tbs water in a small pan until it’s syrupy and brush this on top of the baked buns.

CINNAMON DOUGHNUTS, NAUGHTY BUT VERY NICE!

CINNAMON DOUGHNUTS, NAUGHTY BUT VERY NICE!

Now eat slathered in salty butter!

Any leftovers are lovely toasted - a bit like a teacake - again slathered in butter is a must. Or you can turn them into a delicious bread and butter pudding.

ADDITIONAL COOKS NOTE!

You can use this dough to make ordinary white rolls that are super good for sandwiches by omitting the spices and fruit.

You can also make the most delicious little doughnuts by breaking off walnut-sized pieces of the plain dough (no fruit or spices) and allowing them to rise well and spread out. Then deep-frying them (I use about 4cm sunflower oil in a normal saucepan), just do a couple at a time, drain on kitchen paper and then roll in caster sugar mixed with cinnamon; a naughty treat but oh so good and so light and so fluffy.


lets get crafty

As you know we don't normally like to bombard you with what is happening in the studio but in these extraordinary times if you are a newsletter subscriber we are planning to send you weekly bits and bobs (cuttings), in the hope of providing you with some uplifting, inspiring and creative ideas to help keep you and your family busy during the lockdown. 

Expect interiors, craft projects, cooking, gardening and some creative inspiration for kids too...

First up is a little cushion project, accessible to everyone expert stitcher or novice needleworker! you can do it with basic bits of fabric you may have around or you can purchase a little kit here

Photo 03-04-2020, 14 56 22.jpg

I’m giving you some step by step instructions too: There are some step by step photos below too!

  1. Decide what size your cushion is going to be, our kit ones are 30cm mini cushions.

  2. Find a piece of fabric for the front that is the right size for your cushion pad. with a few cm extra, so in our case 32cm square.

  3. Find some fabric to make the back, we are going to do this envelope style, so if you have a 30cm front, you need 2 pieces 32cm wide x 25cm long.

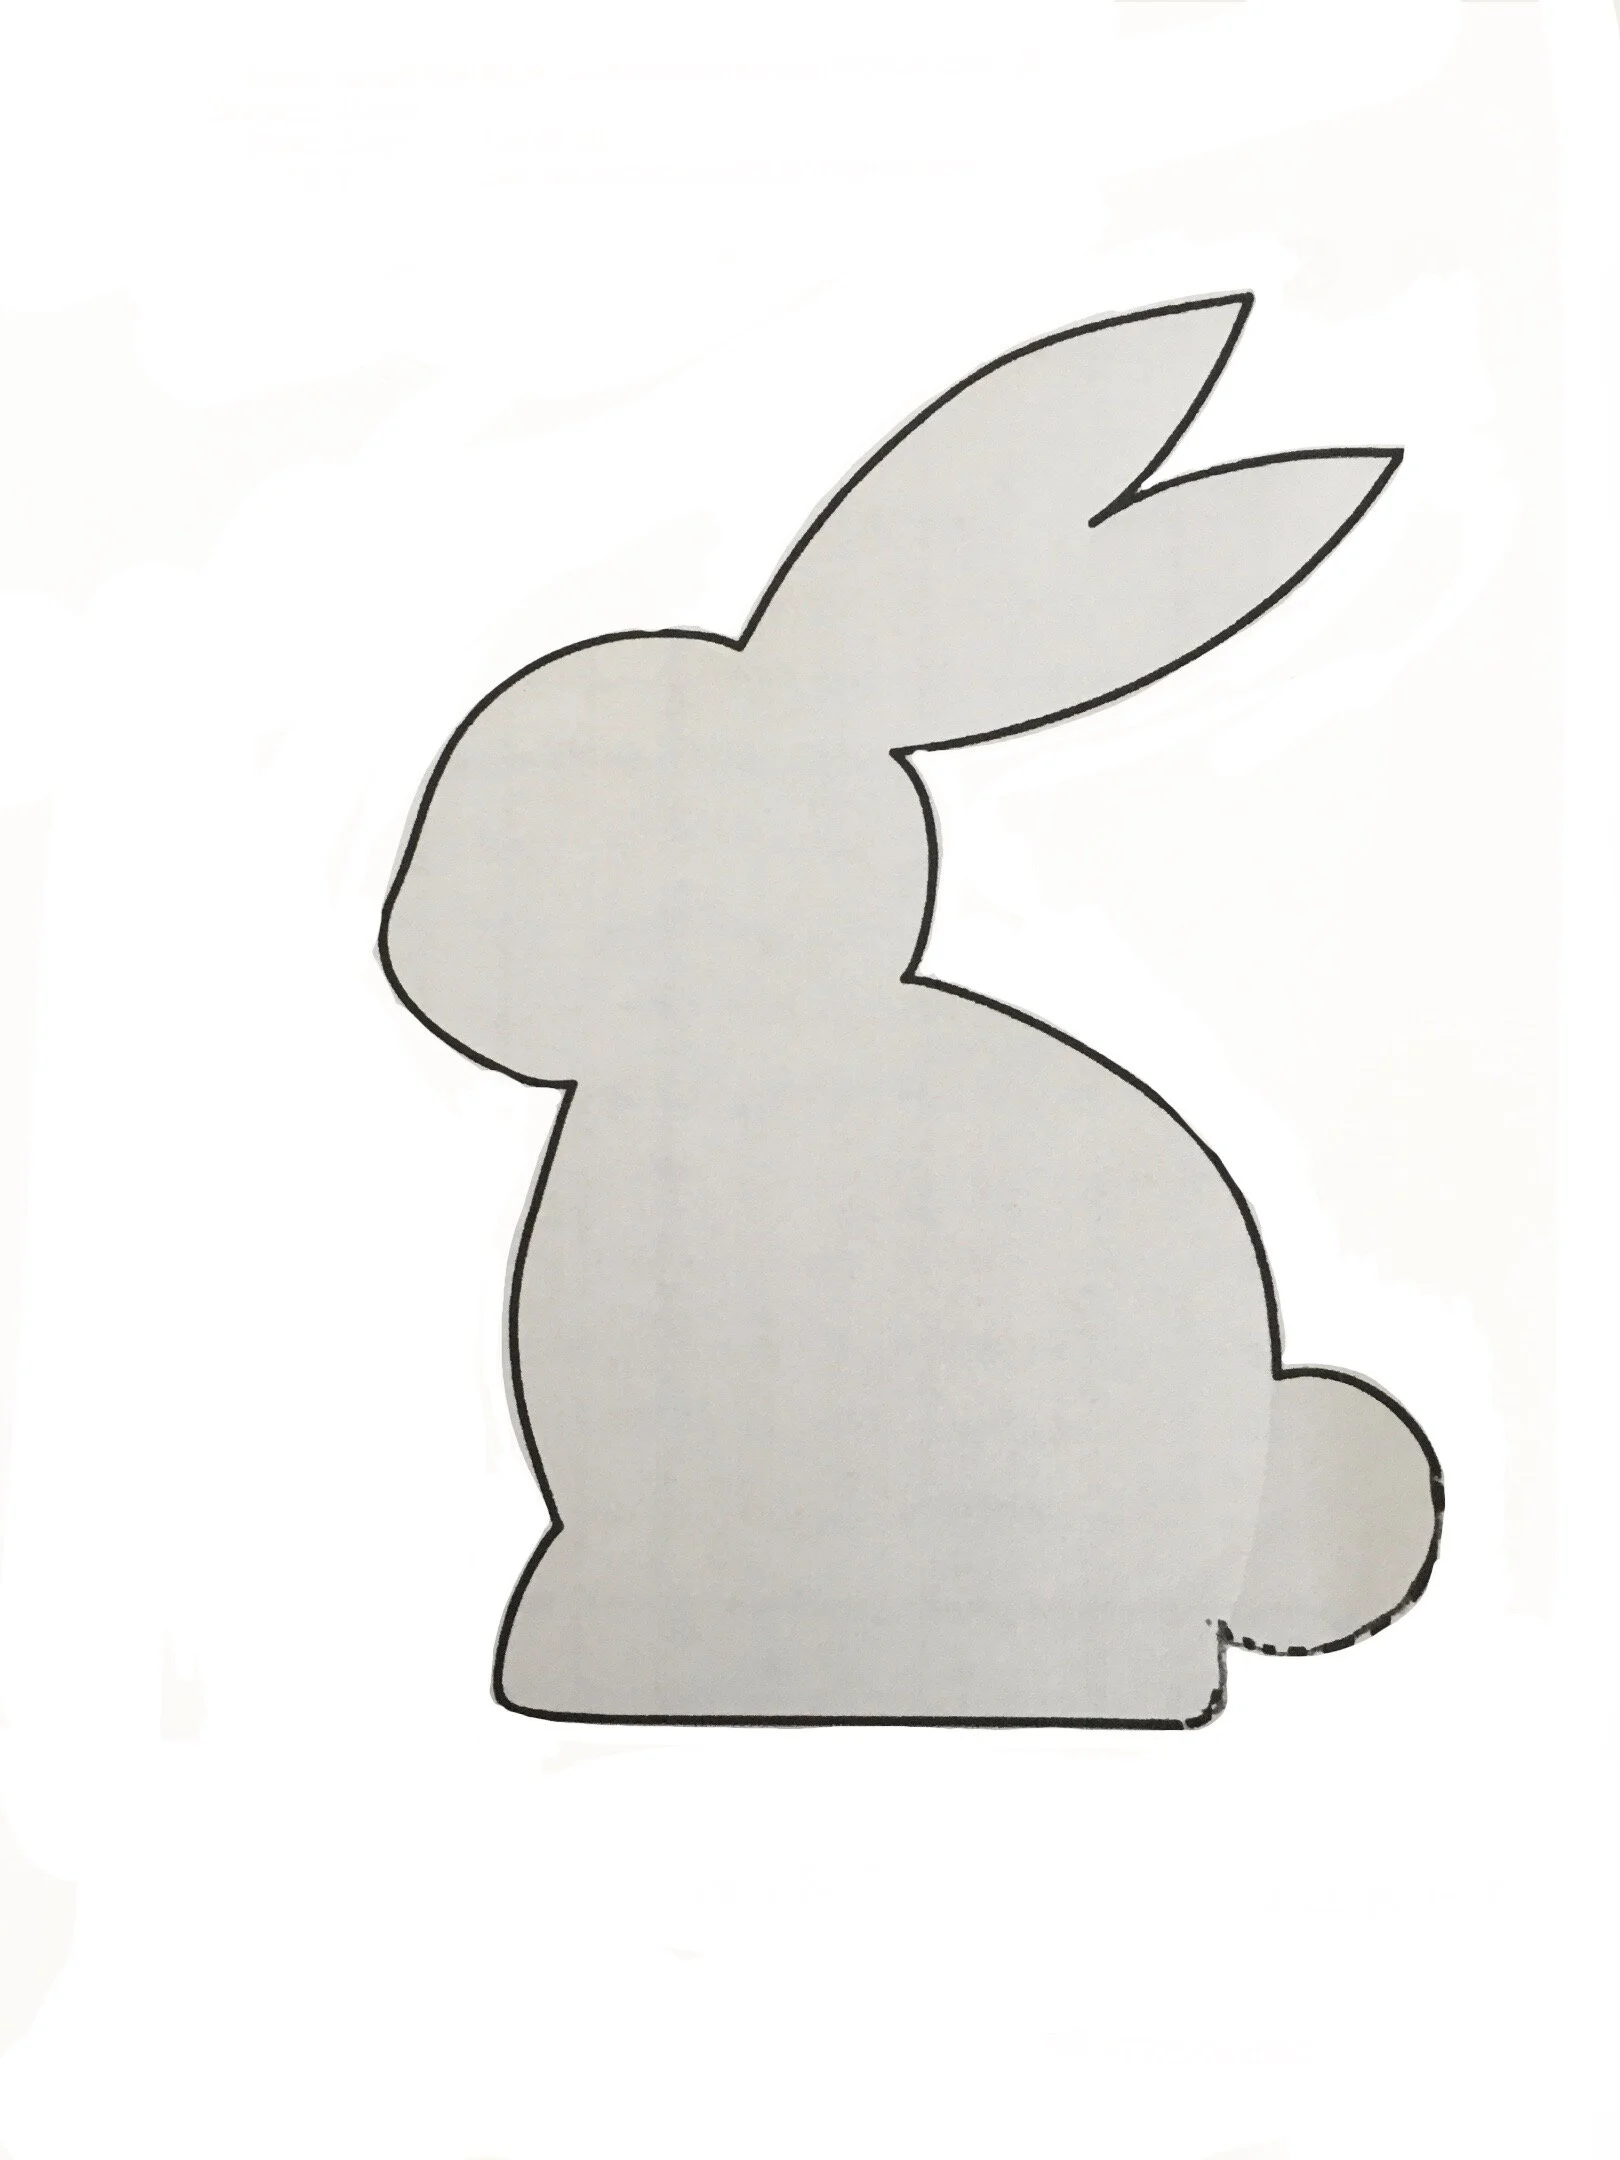
  4. Find some fabric to make your bunny shape. There is a bunny template for you at the bottom of the page.

  5. If you have any Bondaweb so much the better, if not don’t worry, we can do it just fine with some pins - but maybe don’t choose a fabric which frays a lot.

  6. If you have Bondaweb iron it to the reverse of your bunny fabric and draw around your template on the paper side.

  7. If you are doing this without Bondaweb, draw around your template on the reverse side of your fabric.

  8. Very gently fold your cushion front into quarters to give you the approximate middle and lay it flat on the ironing board and put your bunny there and give it an iron, if you are using Bondaweb peel off your backing and iron it onto the middle to your face fabric.

  9. If you are doing this without Bondaweb pin your bunny on carefully - put your pins perpendicular to the edge of your bunny so that you can sew over them easily.

  10. Either with a sewing machine on a zig-zag stitch or by hand sew your bunny to the cushion front, you can also do this with a running stitch if you are doing it by hand or by stitching over the edge of the bunny.

  11. Iron everything flat

  12. Now its time to put the tail on! if you have a kit you will find a tiny pompom in there, if not, then an old button or a little round of fabric, will do just as well.

  13. Double thread a needle and knot the end. Poke the needle from the underside up on the edge of your bunny bottom and stitch on your pompom or button. Do a few stitches to make it secure.

  14. Now its time to make the back. We are making an envelope back here which is really easy. First you need to hem one of the long edges on each piece, its always good to do a double hem, so fold over about half a cm and press with a hot iron , then repeat again so you have a really neat crisp hem, stitch this down with a sewing machine - or by hand with running stitch, and repeat on the other piece. you should have 2 pieces with one long side with a hem and the other 3 sides rough edges.

  15. With the bunny facing you cover it up wi the first piece of the backing , lining the bottom rough edge up with the bottom of your front and the hem should be above the middle of the bunny , now do the same at the top with the other piece of backing but this time with the hem facing downwards, so you have an overlap in the middle .

  16. Pin the pieces together with the pins perpendicular to the edges so that you can stitch over the pins easily. And then turn your work over so the back of your bunny is on top.

  17. Carefully and neatly with your bunny in the centre gently mark a square with a pencil the size of your cushion pad - if you are using the kit that would be 30cm . - don’t worry the pencil line will be inside so you won’t see it.

  18. stitch over the line all the way around the edge and do a double stitch to finish .

  19. trim the edges so you don’t have lots of excess fabric - but don’t get too close to your stitching - about half a cm to 1cm is fine, and then turn your cushion the right way round through the envelope opening .

  20. press the cushion with a hot steam iron - taking case of the tail. TA DA ……YOU’VE MADE A CUSHION!

Photo 03-04-2020, 15 08 57.jpg

here is a bunny template for you to use , you can print it out , enlarge or reduce to fit your project.


Spring Colour Crush

We have had a little glimpse of spring this week; much needed for many of us in these turbulent times. It was so lovely to see the sunshine - albeit briefly. Inspired by shades of mini eggs, (shortly before eating them), I had a little tinker with making a mood board on the iPad - trying to learn new skills while we are all in lockdown!

IMG_0238.PNG

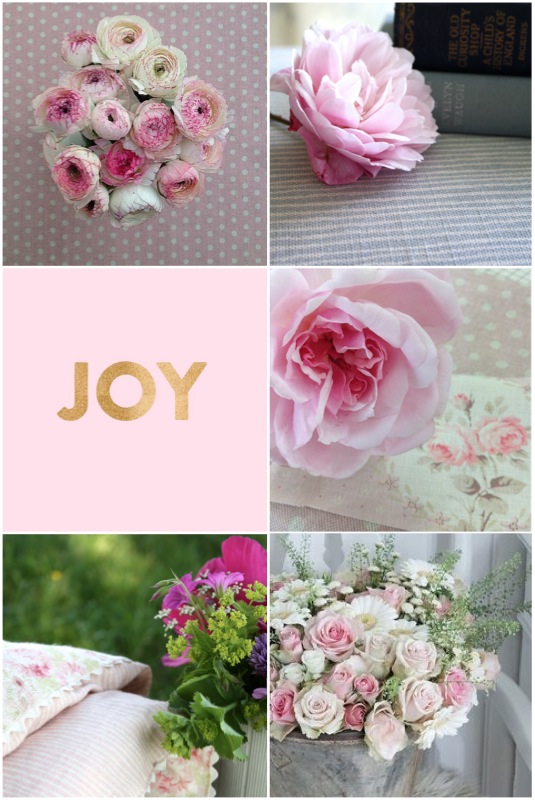
This then led me down a Pinterest rabbit hole. It is so easy to while away a whole afternoon on Pinterest . Looking at my boards here gives you a real insight into my head!

These lovely pictures are on this board and you can link back to their original sources there too.

IMG_2292.jpeg

From our fabric collection are Torcello linen, (below left) which is a beautiful fabric woven in Scotland for us. It has an ecru warp (the up and down threads on a loom) and a coloured weft (the side to see threads) which gives it a lovely soft and gentle colour.

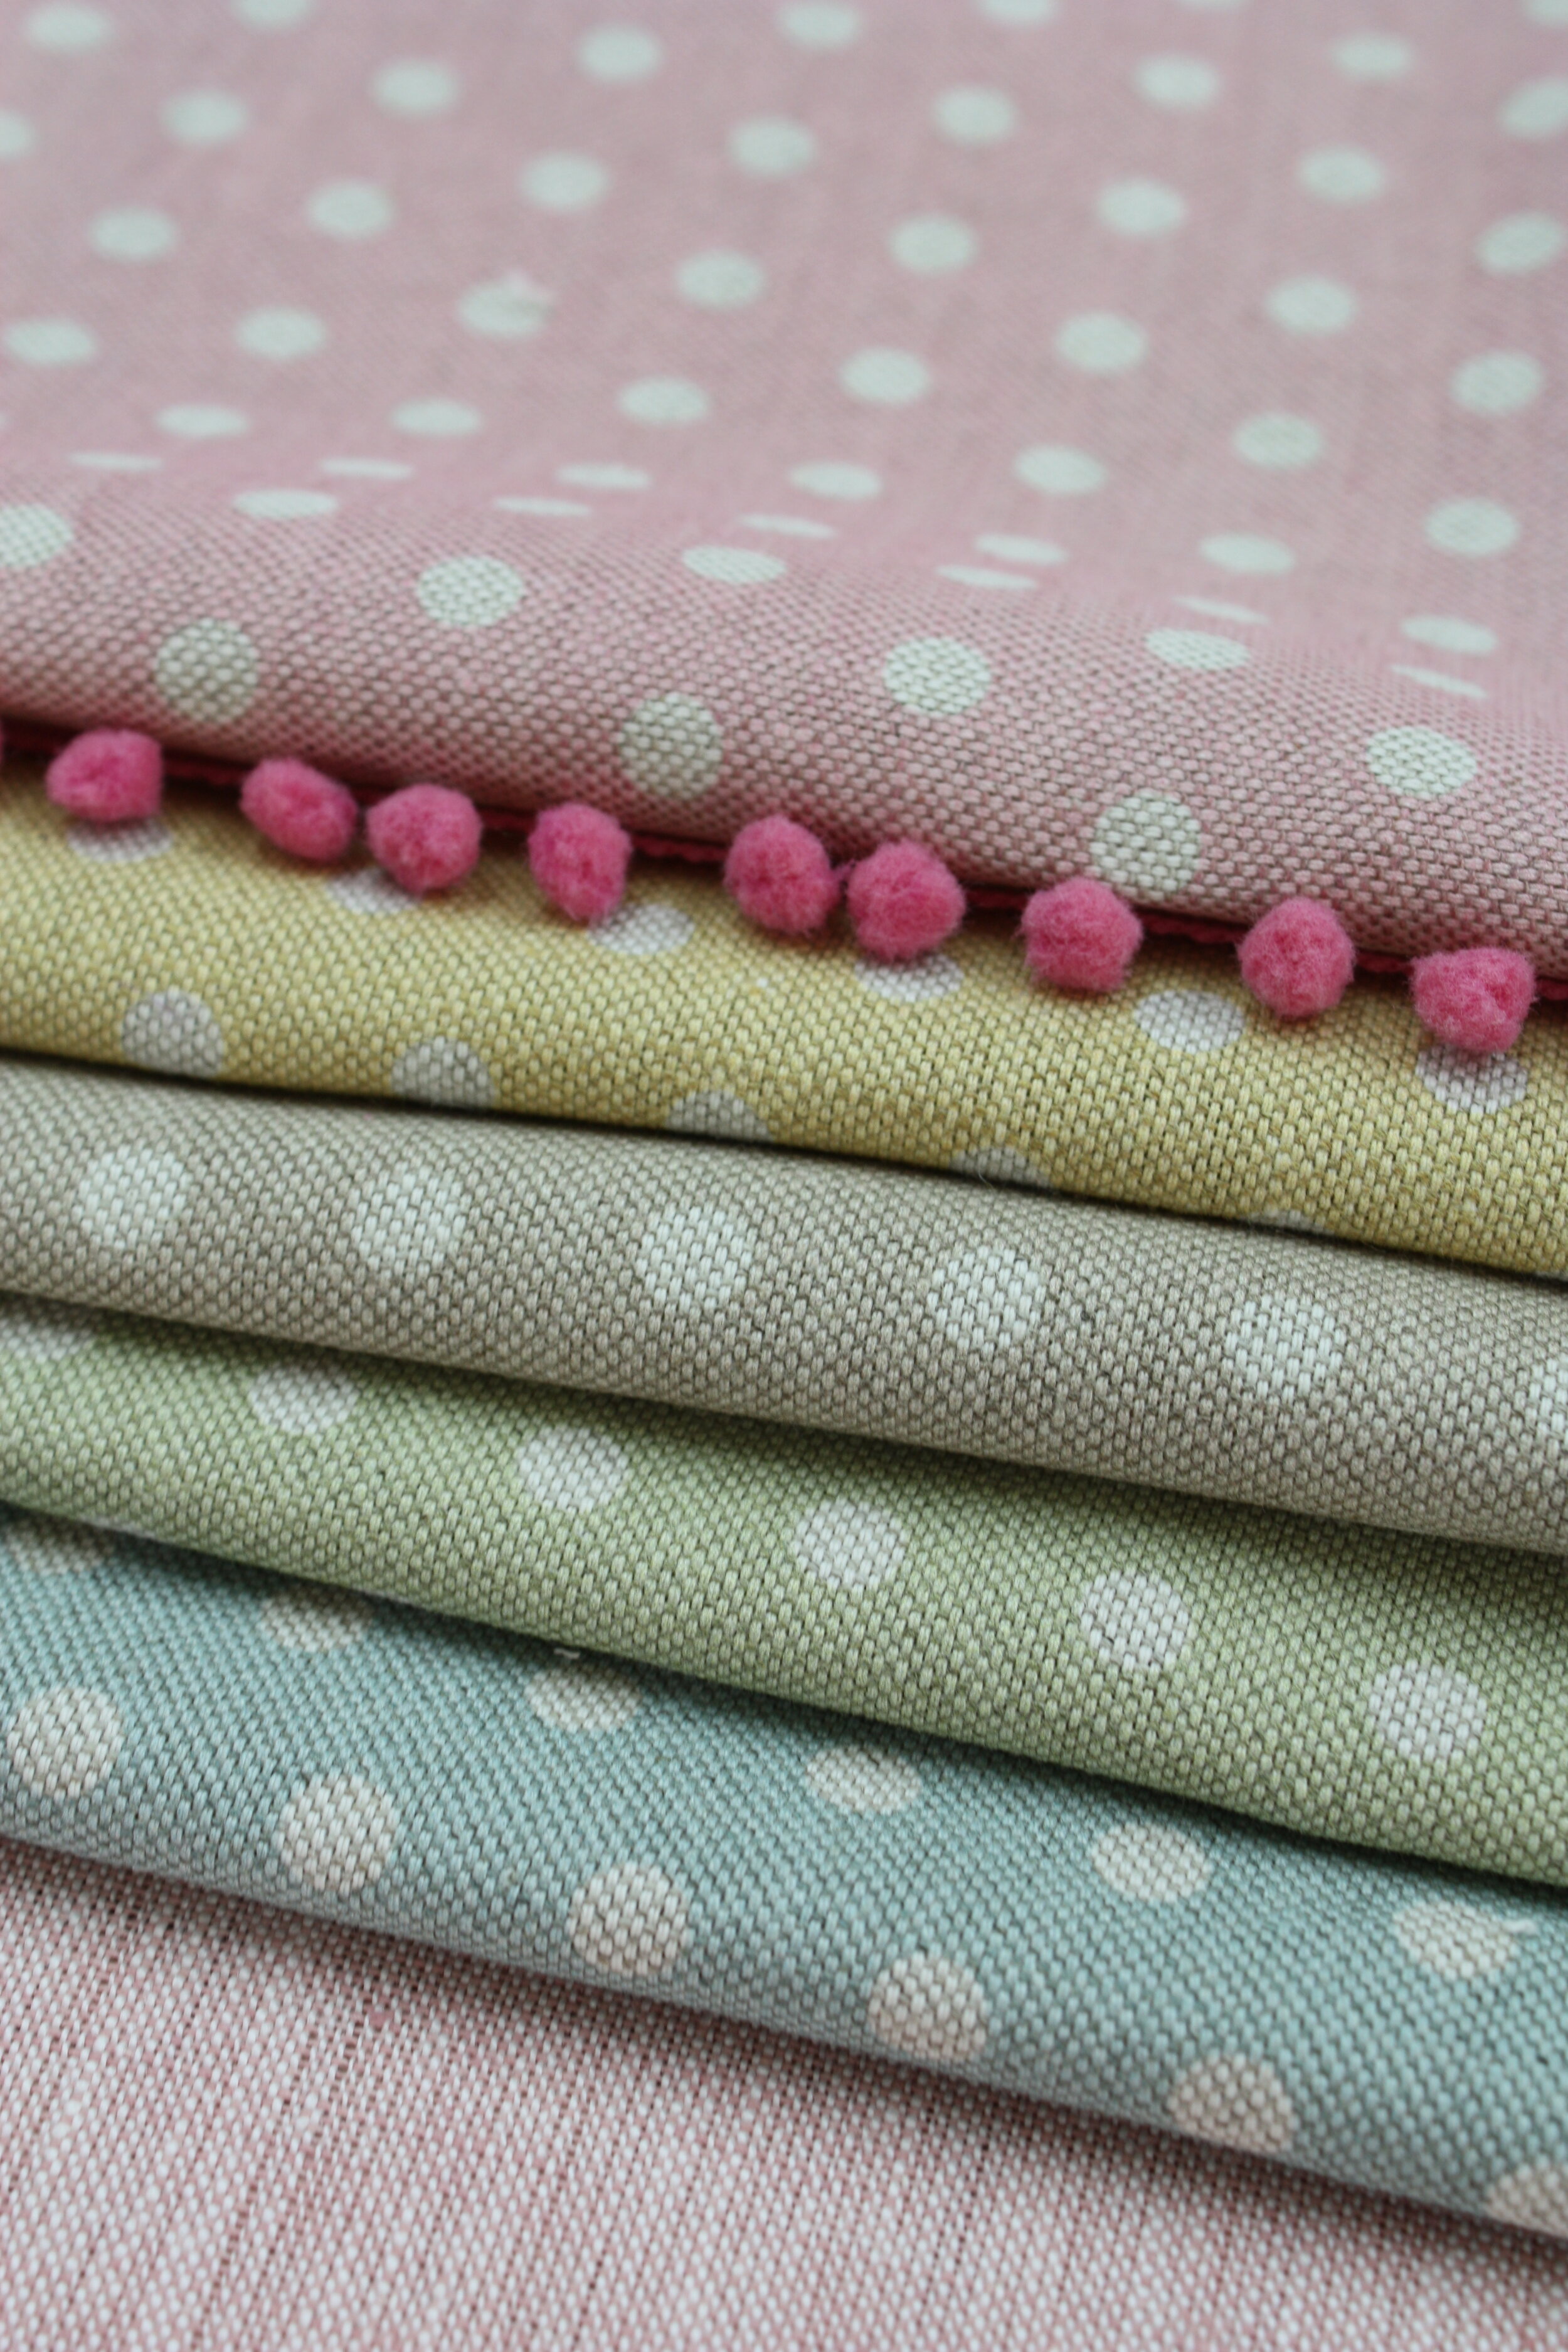
On the right is a very pleasing stack of pastel Polka Dot fabric and pompoms. Did you know we can print our polka dot in any colour for you?

IMG_2712.jpg
IMG_3688.JPG

This has been one of my favourite colour mood boards on Pinterest for ages. It’s originally from love print studio here .

IMG_2289.png

I also found this one from the ever talented Clare Davis. I think the original is from her Insta feed but it popped up in my Pinterest feed.

IMG_2290.jpg

I hope the weekend brings you some colour and joy, love Sarah xx

sustainable Christmas part 2 - shopping !

I was in danger of waffling on forever and a day with my sustainable Christmas decorating post, (scroll down to find it after this one). I love decorating for Christmas but find like most busy working mums that I have to try and set time aside to do it and enjoy it.

Anyway, I forgot to mention Christmas gift shopping while I was getting lost in sustainable decor. I cant deny that online shopping on sites such as Amazon makes life so easy, but it is so important to support local retailers if you can. If we lose our local independents all of our high streets will look identical. This year my little mantra in my head has been ‘shop local, shop handmade’ Obviously this doesn’t work for every gift but where I can I’ve bought from small independent shops and individual makers. My top finds have been Starling Pots lovely little bowls, (you can find them on Instagram). Soap Folk’s gorgeous organic soaps and candle and co rapeseed wax candles.

starling pots

starling pots

soap folk

soap folk

candle and co

candle and co

For my sisters in law, I’ve made big grain sack bench cushions - after we saw them at the vintage car boot sale in the Isle of Wight in the summer. My daughter and her friends are doing handmade gifts this year, could be food, something sewn or drawn - they seem to have tonnes of ideas.

rose brooches .jpg
oilcloth purses.jpg

Two of my favourite stocking fillers from our Christmas gift guide are Daisy’s Handmade Vintage Rose Brooches and our lovely Oilcloth Zip Purses which are big enough for cards, keys, lipstick and all of your receipts but still fit in your pocket. with just £8.

Photo 09-12-2019, 13 41 17.jpg
small parcel of possibility.jpg

One of the most popular things I sold at the recent Amberley Artisans event was our Little Parcels Of Possibility, we always have so much fun putting these little packages of offcuts together. This year we’ve added a little insert with a link to our Scrapbaggery Pinterest board which is full of ideas for gifts made from little scraps of fabric.

blog emb dec 19.jpg

images clockwise from top left Caroline Zoob, Sarah Hardaker, BHLDN.com, Minty House,


sustainable Christmas

I’m sitting here writing this and panicking about the fact I’ve got stockings for 4 children to do this year rather than 2 and arguing with myself about the ease of stuffing them with crap vs my desire to be more sustainable. As a family we’ve made lots of small changes over the last year, it could be the ‘Attenborough effect’ or the rise of the Extinction Rebellion folks but we have definitely become much more aware of our consumption. We are buying our milk in reusable glass bottles from a local dairy, we’ve swapped bathroom toiletries to refillable brands, found places to recycle packaging which doesn’t go in the green bin and have been having fun buying clothes from charity shops and joining in a fabulous local clothes swap. All of these are tiny changes and won’t save the planet, but as Sam, the lovely yoga teacher said today “if everybody made a tiny difference there would be a world-changing overall difference”.

So with that in mind, I thought I would share some ideas for a more sustainable Christmas style. I’ve pulled together a few images from my Pinterest board ‘Christmas’ here, you can click back to see the original source. There are loads of ideas for recycled decorations and homemade gifts on this board.

images from Pinterest

images from Pinterest

image from coollage.se

image from coollage.se

Oh, how I love glitter….. and that has been one of my most difficult things to give up but it’s terrible for the environment and our waterways, so no glitter this year! My other Christmas love is brown paper, and this is totally allowed , even better if its recycled craft paper - yay! Even my husband gets on board with the brown paper and wraps all his parcels with brown paper and funky coloured jute string! I go a step further and tie in little sprigs of greenery or fir cones.

dec 19 bl0g 2.jpg

Every Christmas I hop over to Waterlane Workshops on the other side of the valley to teach a wreath-making workshop with Kate the owner. We always try to be as sustainable as possible and use a traditional moss base and lots of foraged greenery, fallen cones and fruits and seed heads. Florists foam is another thing that doesn’t biodegrade well so if you can avoid it do. One of the things Kate and I always talk about at the workshops is how to decorate your home naturally, so we love to reuse and repurpose. Old jam jars wrapped in music paper with stars or hearts cut out make super tea light holder which look lovely grouped en masse for parties, make sure the paper is below the rim of the jar and tie a ribbon or raffia and a sprig of greenery around for decoration - don’t have one too many and go to bed with a candle left lit! Hostess gifts and teacher gifts can be made by planting a small plant such as a hyacinth bulb or tiny hellebore in a pretty teacup or an enamel mug or an old plant pot. Top the spoils with some moss for a neat finish. You can make a pretty place setting by gilding a pear with gold wax then using a nice pin, fix a piece of card with your guest’s name at the top of each next to the stalk. You can pin an evergreen leaf on with it too. Collect old linen napkins - it doesn’t matter if they don’t match and tie with raffia and a sprig of rosemary with a name card tucked in. Gingerbread is a great medium for all sorts of decorations and gifts and its a great thing to make to keep children occupied (and off their phones for a few hours!)

blog dec 19.jpg

Foodwise, I have gone back to shopping at the Farmers Market on a Saturday and surprisingly I’ve found i’m spending less and wasting less. We’ve all enjoyed cooking and eating more seasonally and also finding recipes to use the ingredients rather than the other way around. This year I’m going to try and not do that mad dash of shopping to excess, we don’t have to cater for every eventuality. I feel we’ve rather lost the idea that Christmas is more about being together and not about spending a fortune on things we will throw away.

Wishing you all a happy festive season.

Sarah xx


colour moody tones

Since we did our photoshoot for our new Chinoiserie After Dark, I’ve become a little bit obsessed with moody, smoky tones, to the point where I almost made my husband paint our very light, bright mid-century sitting room in Little Greene colour Livid. This absolutely wouldn’t have worked in the room so I’ve settled for painting the fireplace instead. I couldn’t let my obsession lie dormant though and he’s going to paint the snug instead. Watch this space for some before and after pics, later in the year.

Sarah_H_091957203.jpg
Sarah_H_091957096.jpg

Anyway, once I started looking at these lovely colours - think Farrow & Ball Inchyra Blue and De Nimes, Little Greene Livid, Hicks Blue and Lead. I started seeing them everywhere I looked! I’ve been saving the images I like onto a Pinterest board which you can follow here. and I’ve put together a little moodboard of pics below for you. All images are from my Pinterest board moody tones, where you can link back to original sources.

pic collage.jpg

I went to a couple of really interesting talks while I was at Decorex this year. Normally, I am on my stand but this year I had a year off and went to three fab lectures. The three stand out speakers for me were Bunny Turner from Turner Pocock (one of my favourite Interior Design companies) - they are brilliant at colour and space planning and creating rooms, with both personality and longevity in design), Emma Sims Hilditch - creator of fabulous, timeless, elegant, yet liveable interiors and Joa Studholme the colour wonder who creates the magic for Farrow & Ball. These three ladies stopped me making a mistake and painting my sitting room a colour that is too dark even though I love it. They all said paint a light room light and if you have a small dark room don’t try and make it light because it will just feel more gloomy, paint it dark so it feels cocooning and it will become a joy to be in and you will use it far more. This was a bit of a light bulb moment and has now led to a bigger painting project than planned - (Lucky old Mr H!) I’m going to share some more of the insights garnered from these talented ladies in a later post.

If you like the idea of using some darker moody tones but don’t want to commit to a whole room you can use colour as a feature. I m really keen on panelling at the moment - I love the range by the English panelling company (We have used this in our photoshoot- you can see it in the pictures above ). In our sitting room, I’ve used it behind my Woodburner on some fireboard. You can also use a dark colour to paint a piece of furniture to add a statement piece to a room. I like to look at miss mustard seed - a USA based company, for inspiration on painted furniture - she also has some wonderfully inspiring Pinterest boards.

Screenshot 2019-11-18 11.46.14.png
Screenshot 2019-11-18 11.47.47.png
Screenshot 2019-11-18 11.50.14.png

Happy painting!


Summer snippets and travels in France

I’m so looking forward to our annual family hols this summer. We are travelling back to the Lot et Garonne region of south west France; one of our favourite destinations.

We are going back to what I consider to be one of the most perfect campsites we’ve ever been to, not because it has lots of activities , or an amazing restaurant , or entertainments - for precisely the opposite reason! It is small, friendly, and beautiful.

It’s called La Parenthese les ormes and it is my children favourite place on the planet! The campsite is in the trees, in the bowl of a valley. The communal spaces are all very stylish with painted wooden furniture in driftwood tones and the bar and restaurant have big communal tables serving simple and delicious food. The kids love it because they always make masses of friends and have total freedom to potter around on their bikes. if Boden did camping I think it would be like this!

IMG_2431.jpeg
IMG_2433.jpeg
IMG_2354.jpeg
IMG_2300.jpeg
IMG_2375.jpeg

There is a market each day, in one or other of the Bastide towns which pepper this region. We pootle off in the morning to the market, select something fresh and delicious to eat for the day, pick up some local wine, stop for a coffee and maybe a pastry and then come back to the campsite and relax for the rest of the day lying in the hammock and reading or swimming.

There are also lots of vide greniers (car boot/ brocante type things) where you can sometimes pick up a bargain - I’m still annoyed with myself that I didn’t bring back the 2 lovely big white soup tureens I found last time ! i’ve added a little link here , so that if you are off to France in the summer, you can search vide greniers by area.

IMG_2285.jpeg
IMG_2286.jpeg
IMG_2339.jpeg
IMG_2289.jpeg

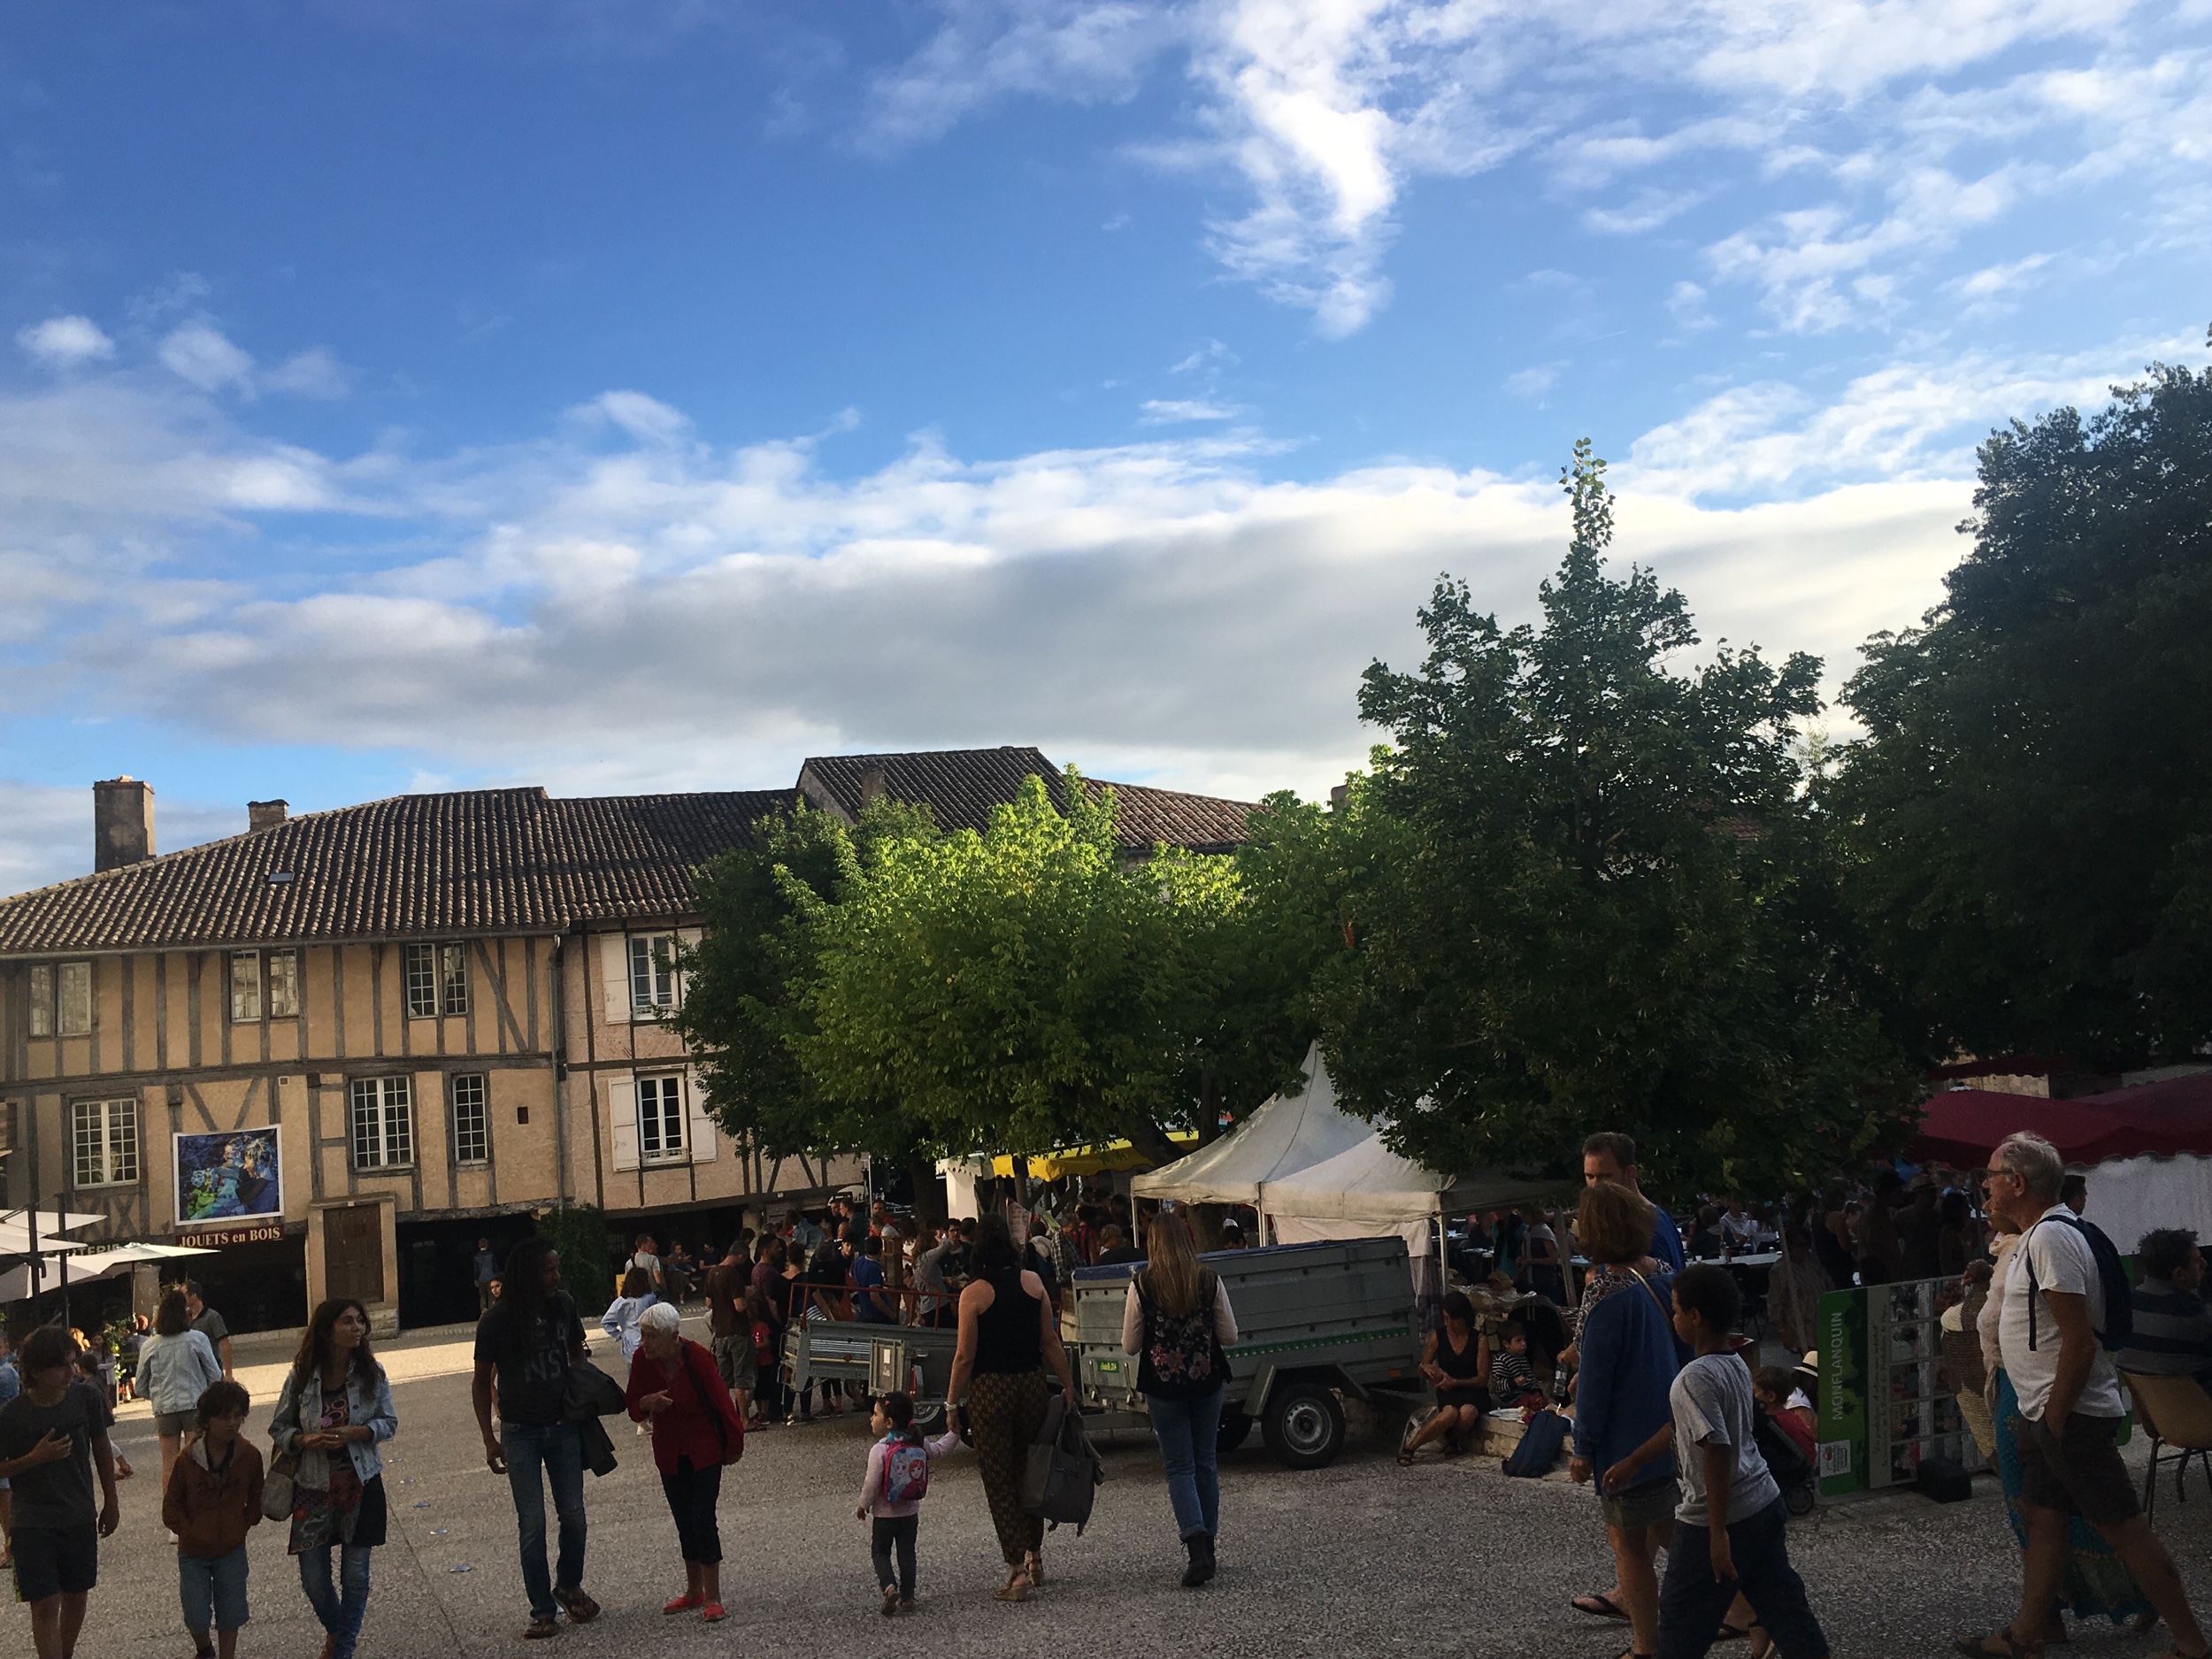
In the evenings the Bastide towns come alive again with the lovely Marche Nocturnes, where local farmers come and set up in the square and cook local specialities such as duck, and vineyards set up stands selling their wine. It took me a few attempts to work out that the French families all take their cutlery, crockery and wine glasses with them! So now we join in and sit at long communal tables chattering to French families, Dutch families and English families, while the children dance along to whichever band is providing the evening entertainment!

IMG_2338.jpeg
IMG_2340.jpeg

More often than not we will head to the beach for a few days on our way home, and our favourite destination for this is Ile de Re. it has lovely clean beaches and you can cycle everywhere. The food is pretty great too - especially if you are a seafood lover! Oysters, moules frites and chilled white wine! Ile de Re is a design lovers dream, because everywhere you go you will see pretty white houses with soft pastel chalky coloured shutters, and masses of hollyhocks everywhere .

IMG_2669.jpeg
IMG_2598.jpeg
IMG_2533.jpeg

I love my garden here in Gloucestershire and love visiting other gardens at home and abroad, my favourites in France that we have visited are the amazing gardens at Villandry, in the Loire valley, Monet’s Garden at Giverney (My top tip for this one, would be too book advance on line , we queued for hours to get in and had very annoyed kids by the time we got in). Also, the gorgeous gardens of Marqueyssac in the Dordogne .

Wherever you head off to on your travels this summer, whether it is home or abroad enjoy it!

You can follow our travels on Instagram here .

IMG_2874.jpeg
IMG_2934.jpeg
IMG_2890.jpeg
IMG_2911.jpeg

spring in the garden

It’s at this time of year that my thoughts start to turn to the neglected view out of my window. I love gardens, but I’m not the greatest of gardeners; I lack the required patience. I want instant results and I don’t like doing battle with slugs!!  That said, I do like to while away a spring Sunday preparing beds and and planning . We have a large garden and we don’t manage it very well. My mother in law was a brilliant gardener and always had good ideas for ours. Since she died we haven’t really moved forward with it. I know what I want which is Hidcote Gardens on a smaller scale! I might have to reign in my ambitions for now!

FullSizeRender.jpg
FullSizeRender.jpg
FullSizeRender.jpg

I love having cut flowers in the house, and while there’s something wonderful about an enormous bouquet of freshly picked blooms, I’m equally pleased with a single stem in a little vessel sitting above the sink or on the dining table. I often pick up old teacups, glasses and tiny cases in the charity shop for precisely this purpose. it’s amazing how just a single sprig of blossom or twig of magnolia or a single rose can bring such joy .

IMG_5342.jpeg
IMG_1693.jpeg
IMG_1121.jpeg

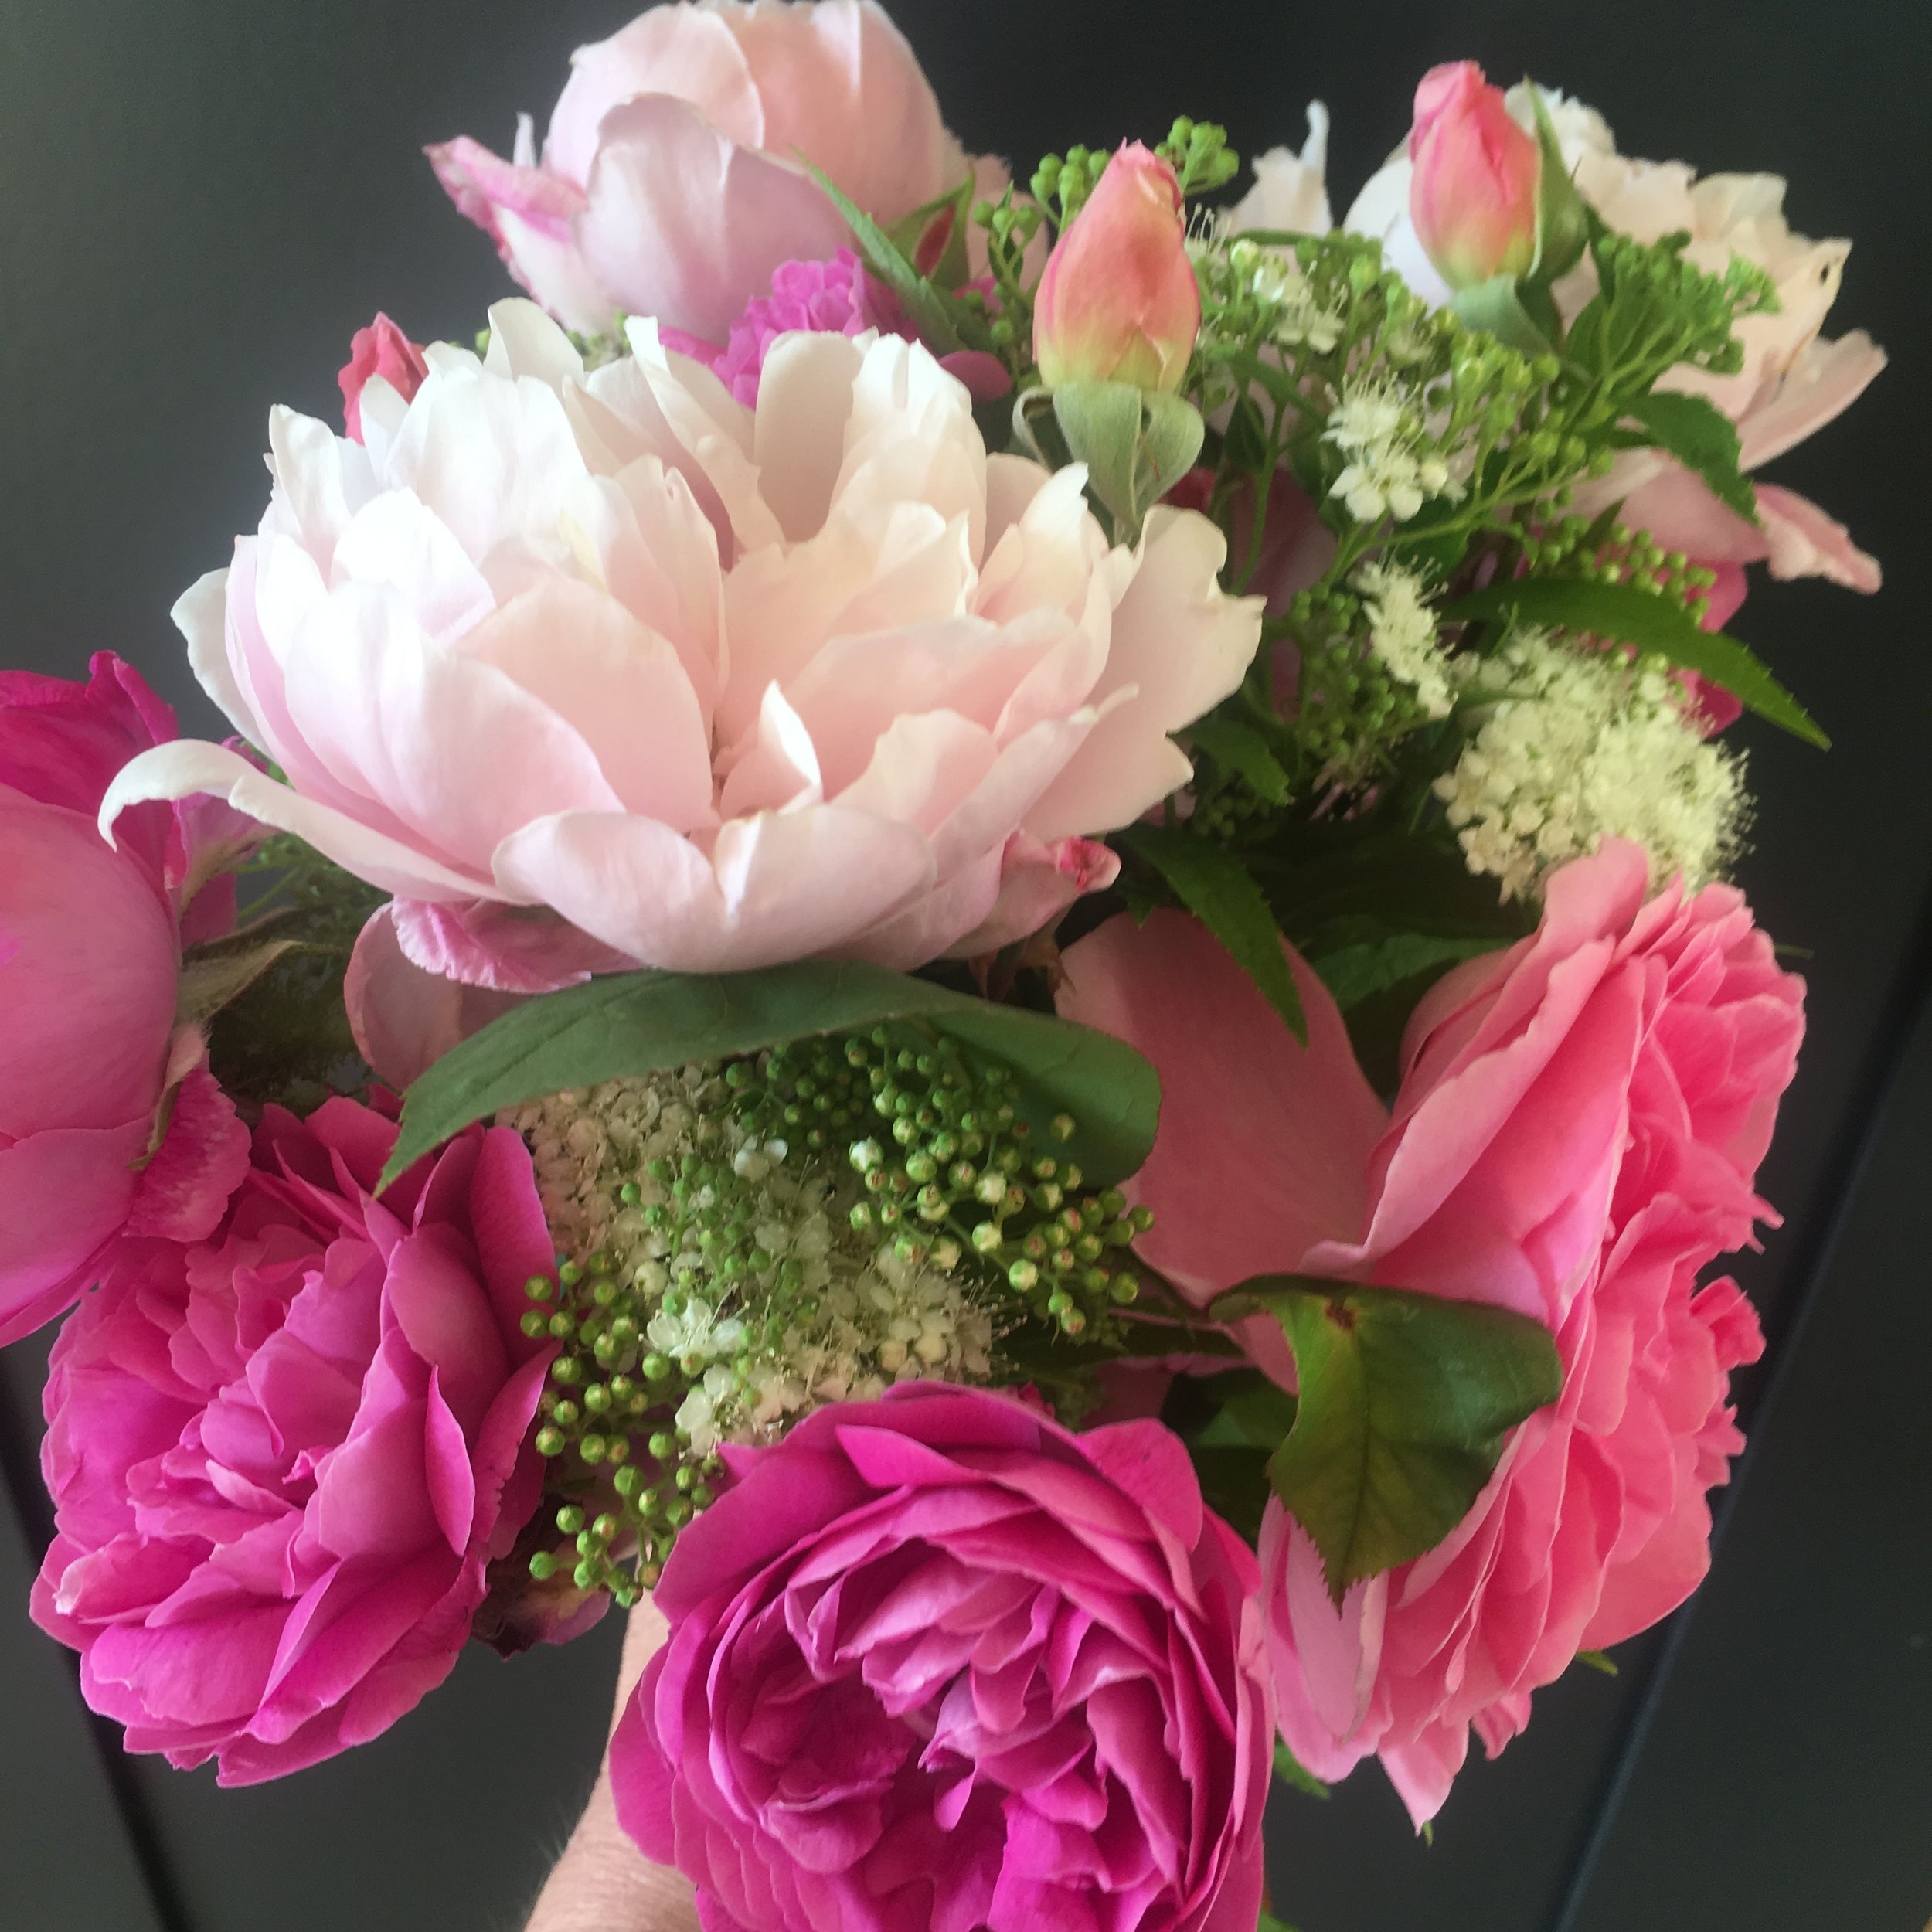
Peonies must be one of the easiest things to grow; they don’t seem to require any intervention - well they certainly don’t get any in my garden! Even though their season is short they are the gift that keeps on giving. A big jar of peonies makes me smile every time I look at it.

Sarah Hardaker Izzi Shell Pink curtain with fabric on the table in Zia Citrine and Dashi Indigo  copy 4.jpg

David Austin roses are a must in my garden. We have about ten bushes; mainly the heavenly scented Gertrude Jekyll, the beautiful moss rose, William Lobb and the very delicate, Mortimer Sackler . Gertrude Jekyll is fabulous for cutting, and William Lobb changes from a vivid deep pink to a papery purple over time.

IMG_1062.jpeg
IMG_1863.jpeg

I don’t think you can go wrong with seeking inspiration from the wonderful Sarah Raven.  She is my first port of call for seeds, small plants and veg.  Her beautiful catalogues are a riot of colour. 

Photo: Sarah Raven

Photo: Sarah Raven

So, this year i’m not going to be ridiculously over ambitious, and do a few things well. I’m planning a smallish cutting patch in one of our old veggie beds, with beautiful scented sweet peas,  zinnias and dahlias -all of which suffer from a munching from the slugs. I might grow these in some big zinc washtubs on the terrace and plant lots of bright cosmos in the cutting bed. 

Photo: Sarah Raven

Photo: Sarah Raven

Photo: Sarah Raven

Photo: Sarah Raven

Photo: Sarah Raven

Photo: Sarah Raven

Photo: Sarah Raven

Photo: Sarah Raven

Photo: Sarah Raven

Photo: Sarah Raven

For veg this year i’m sticking to salad leaves, tomatoes, (my favourites are Sun Gold, Black Cherry, Tigerella, Yellow Pear and Gardeners Delight), baby cucumbers and red Russian kale. All of them are easy to grow and don’t require masses of maintenance.

IMG_8905.jpeg

I grow my tomatoes and baby cucumbers in the greenhouse in these very handy collars which make watering super easy.

IMG_8907.jpeg
IMG_8906.jpeg

Photo credits: Sarah Hardaker (unless marked up otherwise).

It’s beginning to feel a lot like Christmas.

I’m slightly amazed that I’ve managed to write a Christmas blog post.  It’s our busiest time of year with private clients needing finishing touches of curtains and soft furnishing for Christmas and interior design customers frantically finishing checks on deadlines for their clients.  Added to this we have 2 birthdays, wreath making workshops at Highgrove and Water Lane Workshops and Amberley Artisans thrown in to the mix!!  

IMG_7798.JPG

Poor old family have had to have a lot of shop bought mince pies so far  (my Nanny would be positively spinning!) but I’ve pulled my finger out and made some mincemeat this weekend.  I use a sort of hybrid recipe - a bit of a mixture of Delia, Sarah Raven and a few bits of this and that! I like to make lots because it’s a nice gift to take to people and it’s always useful to have plenty in if you want to knock up a quick batch of mince pies for unexpected Christmas visitors.  

With this in mind, I thought I would share some mince pie ideas as well as the mincemeat recipe. Im fairly free and easy with my dried fruit in these, for example I don’t often have currants so I usually use a mixture of sultanas , raisins, dried apricots, prunes and figs, but feel free to do whatever you like; cranberries are good in there as are dried cherries.

Makes about 6-8 jars depending on the size of your jars!

500g of bramley apples grated coarsely

1kg dried fruit - I use a mix of sultanas, raisins, chopped up dried apricots, figs and prunes - make sure over half is raisins and sultanas and then fill up with the rest .

200g chopped mixed peel

50g whole almonds chopped up

4 teaspoons of mixed spice

1/2 teaspoon cinnamon

a few gratings of nutmeg

175g dark brown sugar

175g light brown sugar ( you can use one or the other I always mix both but it doesn’t make a massive difference)

zest and juice of 2 oranges

zest and juice of 2 lemons

About 6 tablespoons of brandy (I also add a couple of tablespoons of marsala or sherry or port or madeira - just because I like it!!)

220g suet (use vegetarian if you prefer)

Simply get a massive mixing bowl and mix it all together , and let it sit overnight with a tea towel over it. Then decant it into sterilised jars. (I put them through a hot wash in the dishwasher and then dry them upside down in the oven for about 10mins to sterilise) , label and you’re done!

IMG_7797.JPG

My children love little tiny bitesize shortbread mince pies .  And Mr H favours ones with marzipan stars on the top!  My one top tip would be not to over stuff your pastry with mincemeat as it does have a tendency to bubble up and then if it spills over you end up with the pies welded to the tin - deeply frustrating !

IMG_7799.JPG
FullSizeRender.jpg
FullSizeRender.jpg

Fellow designer and all round lovely lady, Tamzin McGillen recently posted a gorgeous picture on her Instagram (- i’ve sneaked it in below,) of her delicious looking frangipane mine pies - i’m definitely trying that recipe - you can find a copy of the one Tamzin used her at BBC good food .

FullSizeRender.jpg
FullSizeRender.jpg

New collection and a love of colour.

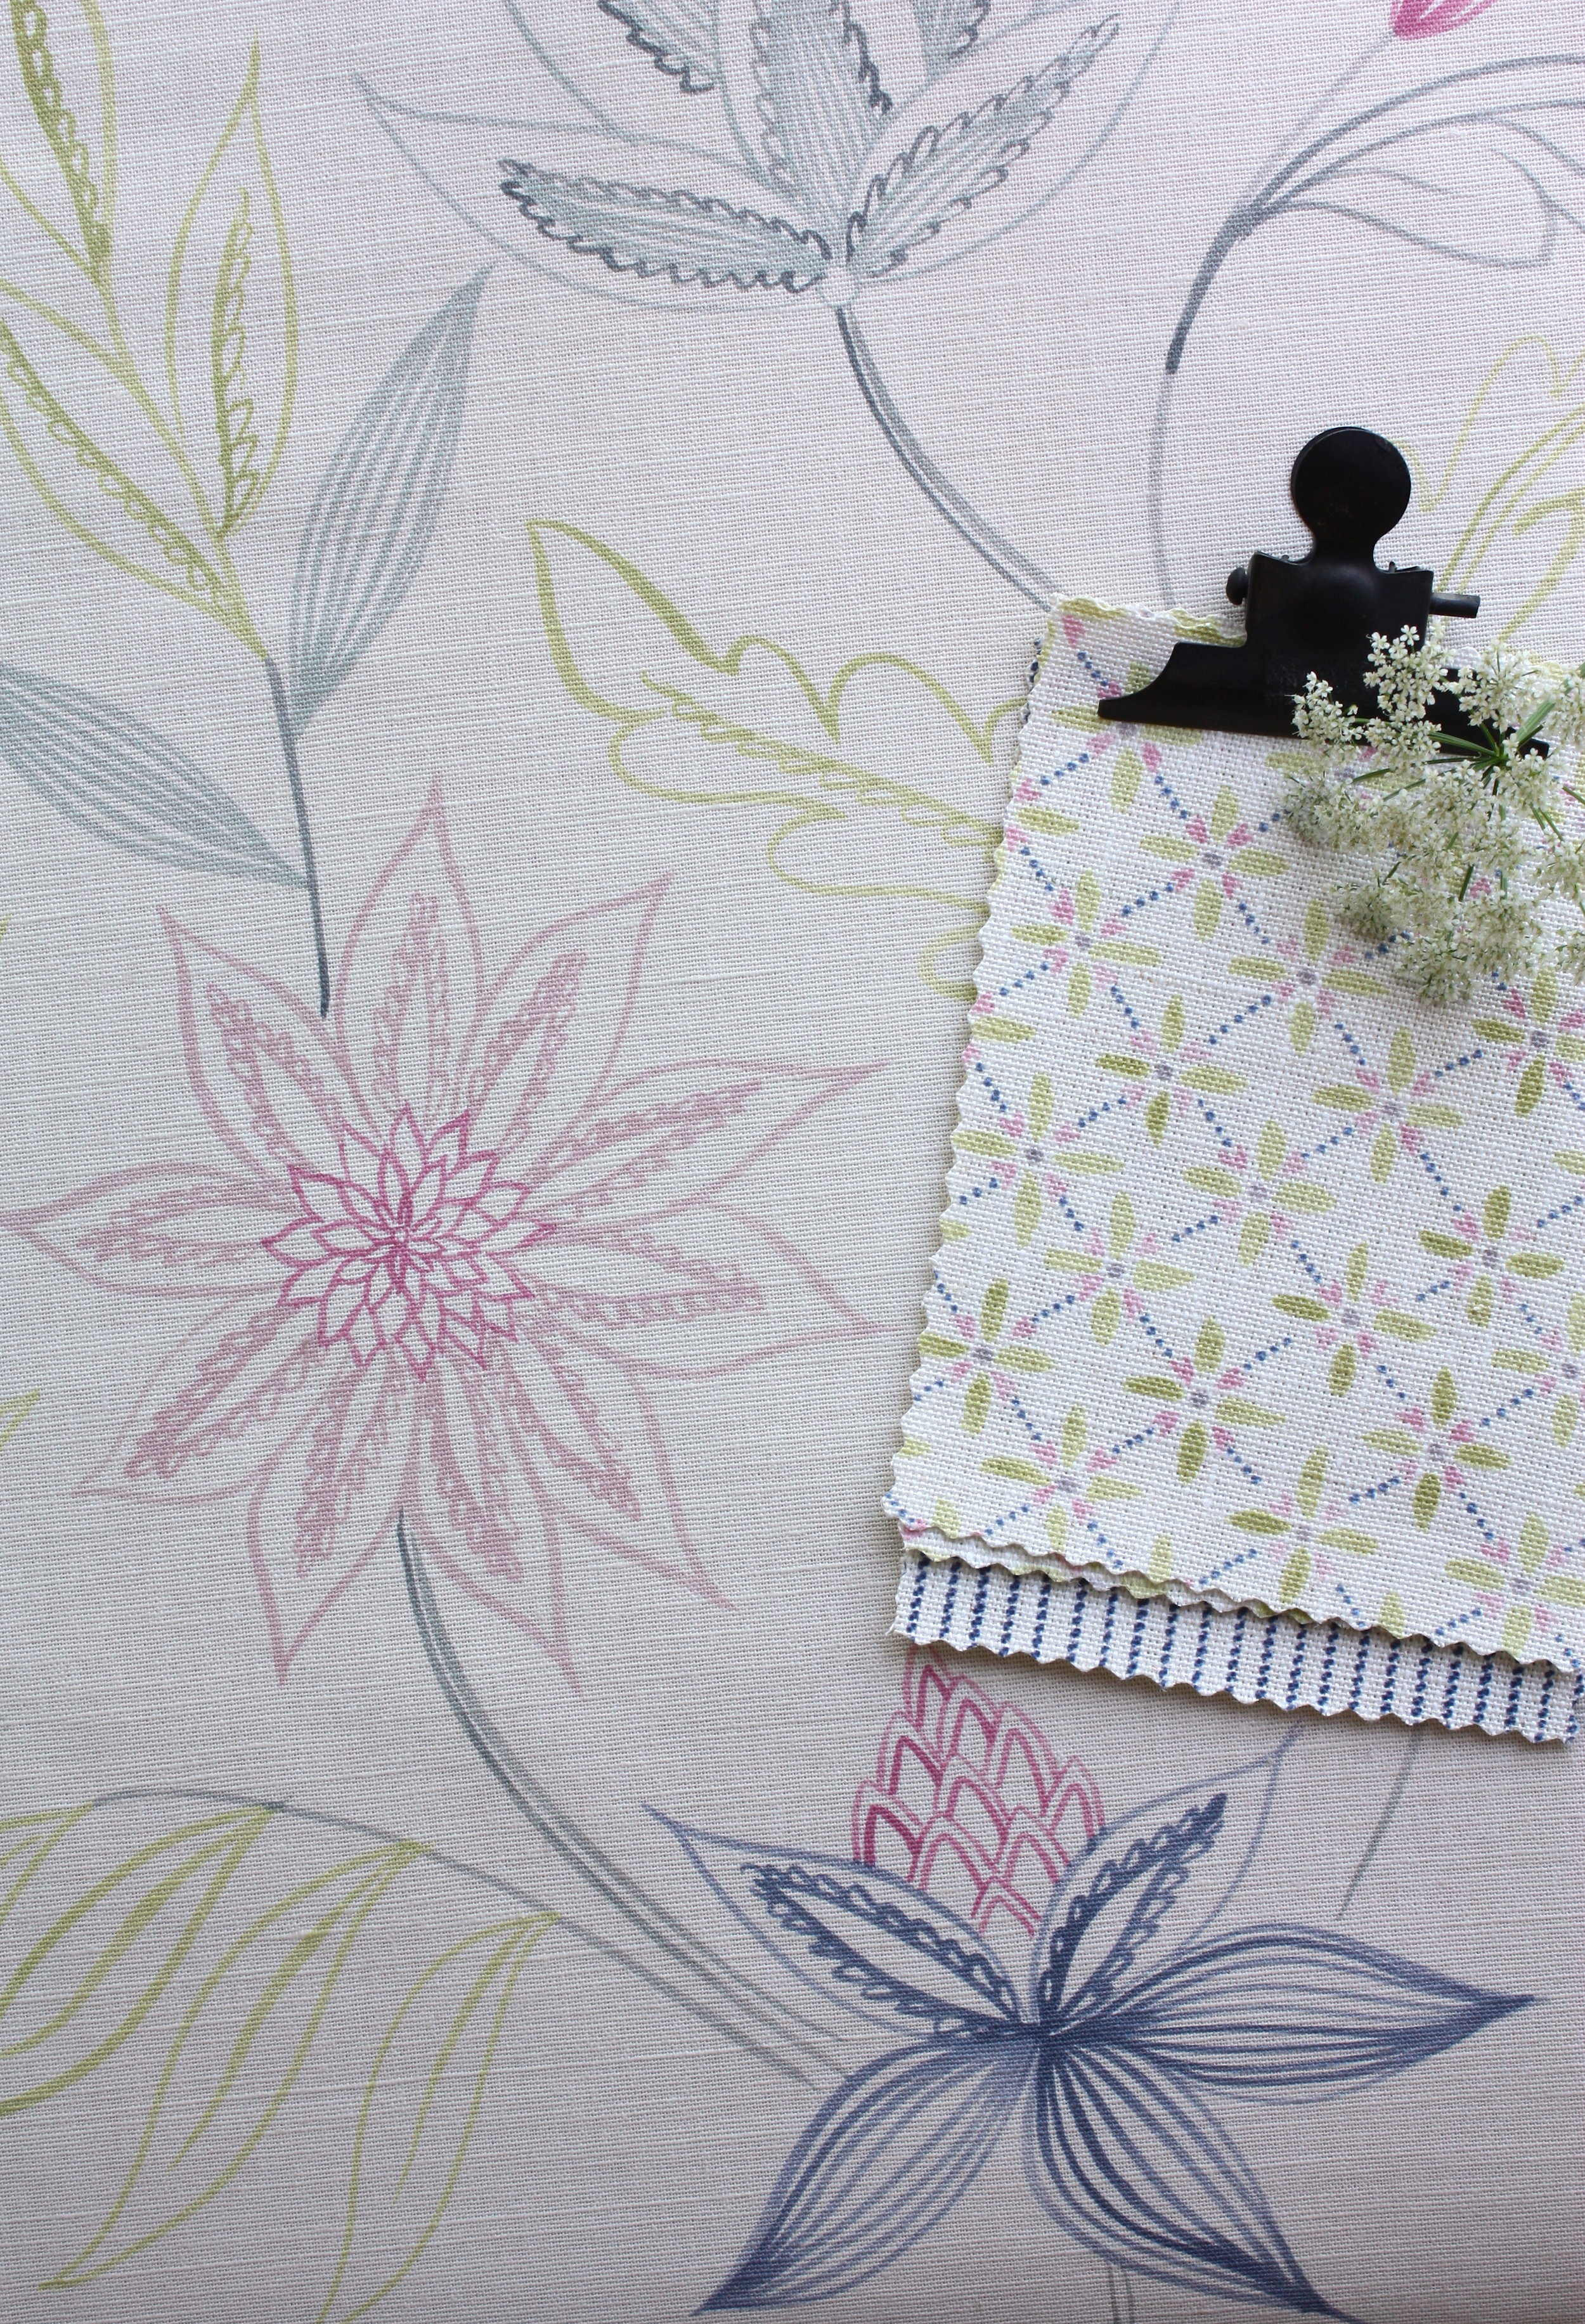
Sometimes a design or a collection  just spills out of you with the greatest of ease.  Other times it’s laboured and hard work.  If a design becomes laboured and I feel that I have to keep redoing it, I know from experience it’s going to be a dud!  I’m thrilled to launch our new collection Zephyr, (thanks to Katy Easey marketing and PR for doing the naming), and I’m pleased to say it was one of those collections that evolved into ‘rightness’ in the blink of an eye.  From sketches I did on holiday to doodling in the studio with Indian ink.  This was a collection that was borne of just enjoying painting and creating. It makes me smile that I kept remembering my old boss, Antony Little, telling me to go and design something I would like in my own house, when I worked for him and was struggling to fit in.  Out of that discussion the seeds of their Lamorna collection were sown, and it was the same principle that I applied to this collection. I hope you like it ….

IMG_7033.JPG
IMG_6944.JPG

The lovely Dashi design was a tiny coordinate I had been playing around with that was loosely based on stitches. For those of you who don’ t know, my background was in embroidery, which is something I still love, and do whenever I get the chance, Its funny as sometimes the designs with the least in them are the most successful. I think Dashi will be one of those designs. It is timeless and really easy to use.

IMG_2396.JPG
IMG_5630.JPG

I did the original artwork for Fern while I was sitting in the sunshine in France; all was peaceful after lunch on our campsite. The kids had taken themselves off to the pool, Mr H was snoozing in the hammock and I sat under a tree and doodled away; drawing some stylised fern shapes based on something growing in the hedge!

I really like hand painting my artwork and do as little as possible with it once its painted, you can see from the print on fabric that all of my wobbly brush marks are still there, you can also see when i’ve loaded the brush again by the heavier colour.

IMG_3753.JPG
Photo 30-11-2017, 12 30 49.jpg

Izzi (above) is a really pretty and airy, slightly graphic, floral. It is in fact based on our very popular Suzi design but printed in reverse in softer colours. Its very light and breezy and looks totally different to Suzi.

IMG_6945.JPG
IMG_7423.JPG

Flora (above right) is a really pretty and quite large, meandering trail design. it comes as a single colour and a multicolour, I was just going to print it as a single colour, a little bit like a modern take on a toile, when my daughter Bella said she would really like to see what it looked like with pink flowers and blue leaves so we did a couple of multicolours too, including her pink and ink version (see below ) and the citrine and grey version above.

Zia (above left), is a really lovely little hand painted geometric. Im not very good with what I would call hard geometrics, I like things to look a bit soft and wobbly. You can watch me putting the finishing touches to Zia design here . You can also listen to the radio 4 news which is on in the background!)

flora dashi zia indigo pink citrine flower .JPG
IMG_4948.JPG

Izzi is a really pretty and airy slightly graphic floral. it is in fact based on our very popular Suzi design, but printed in reverse in softer colours. It is very light and breezy and looks totally different to Suzi.

local artists and lovely gardens

may is always one of my favourite months in the Stroud valleys, the hedgerows billow with clouds of cow parsley, and drifts of buttercups light up the common.  it is also the month of open studios, where artists, designers, potters and makers open their doors and welcome visitors.

Kate Loveday is one of my favourite local artists, her paintings are very popular and there is always a queue outside her door on the first day.

Photo 06-05-2017, 11 27 00.jpg

Kates paintings appeal to the textile designer in me I think, the colour and composition and mark making are just beautiful.

The inspiration for Kates paintings can be seen all around her beautiful home. I have been going to Kates open studio since we fist moved here over 10 years ago and I have always been inspired by her beautiful home. Pale walls are a foil for colourful collections which appear here and there in the paintings - a spotty jug, a tile tray or a row of pebbles.

Everything about kates exhibition is a feast for the eyes,  open  the big pale green wooden gate and creep down the narrow high walled passageway  into Kates beautiful walled garden, where her lovely wisteria clad house stands with the door open to welcome you into the exhibition. Kates paintings are displayed in all of the downstairs rooms which is such a lovely way to view paintings as you can get a real sense of scale and how they look in a real room setting.

for information or directions please see the stroud open studios website here

there are a plethora of super talented artists in the stroud valleys so you could make a day of it! its the farmers market on a Saturday where you can feast on some fabulous food - my top tips are salt bakehouse pop up in the foyer of John st SVA  and the wonderful felafel people in the market  - I promise you , you won't leave hungry! happy weekend!

learn to make soft furnishings in beautiful Tetbury

Without a doubt starting this business over 10 years ago has led me on a journey. There have been ups and downs as there are with any business, but one of the best things about it has been meeting some really lovely people along the way. 

One of them is Helen Izzard who runs Helen Izzard designs in Somerset. If you are an instagrammer you can follow Helens lovely photos here. 

Helen Izzard sarah hardaker

When we bumped into each other twice in one week at the end of September Helen was telling me about the workshops she is holding in the beautiful market town of Tetbury in 2017. Perfect for anyone wanting to learn how to make their own soft furnishings. 

I asked Helen what prospective students would cover on the 2 day courses

"Students work on their own projects from start to finish, so measuring, pattern repeats and hand sewing etc etc.  Generally, we get a mixture of curtains, roman blinds and cushions, so although it says curtains and blinds, we can cover a mix, and each student will have their own ideas and I guide them through.  I try to encourage small to medium projects due to room and also so that they can achieve a lot in 2 days."

if you would like more information about the workshops please contact Helen at info@helenizzard.co.uk she can also supply a range of beautiful British fabrics for you to make into your soft furnishing project. 

Helen Izzard workshops

a little TV moment

June is such an inspiring time here in the studio, the roses in the garden are in full flower and its the time of year that we do all of our colouring for our annual trade show Decorex. 

We had a lovely visit  from Country Homes and Interiors magazine, who popped by to spend a day in the studio. We had such a fun day laughing and chatting (and eating!!) that I forgot to be nervous about making a gaffe!!  

I hope you like this lovely little film about life in the Sarah Hardaker studio.  


Huge thanks to the wonderful team at Country Homes and Interiors for your continued kindness and support.  


Share

foraging fun

this little post should really have been published a few weeks ago, however as always life gets in the way of doing beautiful things like blogging! 

The woodlands surrounding our house are filled with white whirls of wild garlic, 

Anyway for those of you with any wild garlic filling the woodlands around you , here are a few little weekend recipes for putting it to good use!

one of my favourites is wild garlic pesto.

i dont really measure i do it by eye! 

so you need a couple of big handfuls of wild garlic leaves - well washed and dried in a salad spinner or on a tea towel. a handful of fresh basil - stalks leaves and all, a handful of roasted almonds (cheaper than pine nuts yet just as tasty!) a handful of grated parmesan or pecorino, a good glug of olive oil and a pinch of seasalt. (NOTICE NO CLOVE OF GARLIC - THE WILD GARLIC LEAVES ARE GARLICKY ENOUGH). 

put all of the ingredients into a food processor and blitz together adding a dribble more oil if needed till you get a consistency you like. - I have quite a powerful processor so if yours isn't give the nuts a quick whizz first to break them down a bit.

when you've made your pesto you can use it on pasta, under the skin of a chicken before roasting, dribbled over a tomato and mozzarella salad, or in these little cheese sable biscuits.

blitz equal quantities of flour, grated cheese and butter in the processor till a ball of soft buttery dough comes together. flatten it out on to a piece of greaseproof paper and spread with your wild garlic pesto, then roll up into a sausage shape , wrap in the peer and refrigerate for at least an hour. when the dough has chilled, unwrap it and slice into discs about half a cm thick and bake in a medium oven till just golden. - BE WARNED THESE ARE SERIOUSLY ADDICTIVE!

wild garlic flowers make the most delicious fritters served with a chilled glass of wine!

mix equal quantities (i use 1/4 cup measure) of plain flour and cornflour in a roomy bowl, season and whisk in very chilled lager till you have the consistency of double cream. heat a good 3cm  sunflower oil in a small pan and deep fry your fritters a few at a time, sprinkle with a bit of seasalt and fresh ground pepper and serve with some sweet chilli sauce to dip into!

I'm sorry - i didn't get an after shot because my greedy family scoffed all of the fritters before i could photograph them!!!


Oh I do like to be beside the seaside!!!

We've been out and about a lot over the last few weeks. Lots of quotes and schemes and meeting with clients. We did manage to squeeze in a trip to Cornwall in the camper with a bunch of great friends.  Dotty our camper van is rather fetchingly decked out in our polka dot fabric!


Because we are West Country based Cornwall isn't such an ordeal travel wise - like it was when we lived in Lancashire. So we were there in time for lunch at Nathan outlaws fish kitchen in a very wet and windy port Isaac - which was delicious and highly recommended. The food is a short and seasonal changing menu of interesting small plates.  We had baked Porthilly oysters with smoked bacon and cheese crumbs, pickled herrings with fennel and orange, sole with purple sprouting and brown shrimps, and the kids had fabulous sole fillet sandwiches on sourdough with shoestring fries , YUM!!

When the weather is good the British seaside is hard to beat and Cornwall has so much for offer

 from  rocky coves (Port Isaac)

to picturesque fishing harbours (Mousehole) ,

the wonderful sandy surfing beach at Polzeath

and the achingly beautiful light in St Ives.

Added to that the attraction of a chance meeting with Captain Poldark (…sigh……. !!!) its a great place for a break by the sea!! Cornwall particularly has really stepped it up a notch on the food front too (as we know food plays a huge part in the life of our family!) here are a few of my favourite locations for fab food in Cornwall.

The Gurnards Head

The Porthminster beach cafe

The Coastguard

Rick Steins chippy (try the deep fried oysters with a pot of homemade aoili)

all this talk of the seaside is making me feel distinctly nautical!  for details out our stars, semaphores, sparkle and anchors fabrics click on the links.

stars.jpg


this and that this week!

I honestly dont know where the weeks are going at the moment! We seem to be racing towards easter at a rate of knots!

we have been very busy getting some pretty mothers day orders out to customers.

I am hoping this year for some little succulents for mothers day this year rather than the traditional flowers. I am loving these little plants so much at the moment!

i am sure the colours of this little plant that i photographed at wild at heart in london must have inspired the colour for our new colour way of chinoiserie chalk, - watch this space lots of lovely colours to be added to the website over the next week or two!


Australian florist  Helen Leighton (who i had the pleasure of meeting last year) has a fabulous pinboard of succulent wedding ideas on pinterest. I love the idea of them in mixed bouquets.

succulants.jpeg
succulants 3.jpg

…….talking of flowers and all things mothers day, my lovely friend Paul from the fabulous florist Petal to the Metal, is popping up in Paul Smiths iconic flagship store in Londons Floral St this weekend. London followers will be able to nip into Paul Smith store and pick up a fabulous mothers day bunch. If you can 't make it to london then you can follow Paul on pinterest or instagram .

I am yearning for a bit of sunshine at the moment and keep thinking about holidays. When my lovely parents in law were alive we used to meet them in Sicily every year for a week in october, my father in law was the vicar of the anglican church in Taormina in October each year! So i really enjoyed reading Liz from the red bistro blog post about a recent trip to Sicily. Her photos really do encapsulate the unspoilt beauty of Sicily.


Liz is an amazing cook who lives in Malta, you can follow her blog here, its a little ray of sunshine on a wintery day!


Hope you all have a fun filled weekend, and a happy mothers day to all of the lovely mummies out there .

heres a little quote to end on ………